Refrigerator Overload Protector Testing Using Multimeter
Today I am writing about the refrigerator overload protector testing using a multimeter. In this post, I will completely guide you on how to test a refrigerator thermal overload protector using a multimeter. As you know that “thermal overload protector” is designed to protect the refrigerator compressor during overcurrent flow. I also published a post about the working principles of refrigerator compressor thermal overload protector. The overload protector is connected near the starting relay of the compressor and connects to the compressor’s common terminal. When the thermal overload protector heats up or makes an open connection internally the compressor stops running. The working of the thermal protector is to stop the electric supply during the overcurrent flow to the compressor or when the compressor becomes heated up. Sometimes when the ref compressor becomes heated up the thermal overload protector stops the electric supply to the compressor to protect the compressor winding from burning. To learn more about the working of refrigerator thermal overload protectors click here.
Also, Read
How an overload protector works
How a PTC realy works
How to test and wire refrigerator thermal thermostat switch
How To Test Refrigerator Overload Protector Using Multimeter
- The refrigerator overload protector testing is very easy using a multimeter, to test your refrigerator thermal overload protector follow the below steps.
- First of all off the refrigerator and plug out the refrigerator supply plug from the outlet, or switch off the double pole circuit breaker from which the refrigerator supply plug is controlled.
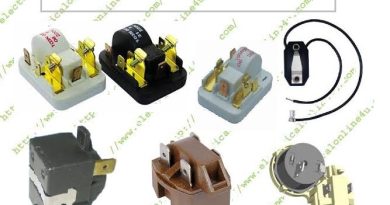
- The thermal overload protector is connected or installed near the starting (PTC relay) with compressor terminals. Just remove the relay from the compressor and then remove the compressor overload protector.
- Remove both wires from the thermal overload protector.
- Then set your multimeter on connectivity test or diode testing. Connect one testing lead to one terminal of the thermal overload protector and other testing lead to the other terminal of the compressor overload.
- If you find that there is some connectivity then it means that the overload is alright and working properly. And you don’t need to replace the overload.
- And if you don’t see any connectivity then wait for 5 to 10 minutes and then test the thermal overload protector again. And if still has no connectivity then it means that your refrigerator overload is an internally open connection or cut. And you must change the overload protector with a new one with the same range.
Refrigerator Overload Protector Testing Using Multi-meter
Here I try to make you understand using a simple refrigerator overload protector testing troubleshooting diagram. In the below diagram, I have shown an Analog multimeter set on the connectivity test, and ohm test (resistance testing). And I connect the one testing leads to one terminal of overload and other testing leads to another terminal of the overload. In the diagram, I showed that the multimeter showed no reading or no connectivity which means that the overload is not working or is internally open.

In the below 2nd fridge thermal overload protector testing troubleshooting diagram. I showed that the multimeter shows the reading and shown connectivity between two points which means that the overload is working properly and no need to change.

In the above diagram, I have shown clearly that if the refrigerator thermal overload protector has connectivity between two points then it means that the overload is working fine. But sometimes if an overload is not tripping or does not make an open circuit during overcurrent flow to the compressor then this overload is not a good overload. So the proper method to test your overload compressor starting time and running time current (ampere) and if the overload is not opening the circuit during the overcurrent flow then change the overload protector.
Now if the overload is an internally open circuit then change and if it has connectivity between both terminals of overload then test other common places and problems of refrigerator not working. I hope by reading this refrigerator overload protector testing guide, now you will be able to test the fridge thermal overload protector. Be safe and follow all safety rolls before starting testing or replacing the thermal overload protector for the refrigerator compressor.
Make one introduction and maintance note on and connection diagram of Air circuit breaker…
nice….
plant licenses, plant reproducers rights (plant assortment protection) and presently utility licenses are there which makes the plant protection improved in the nation nearly. EMF Protectors
Soooo handy post you dropped here for us. This was an incomparable post regarding the appliance help. The refrigerator overload protector testing tool parameter features and functionality you detailed here was very technical support for the home lovers and I would like to say my cordial thanks for this wonderful support. Also right this moment I can recommend cooperfix for any fridge or other appliance solution just walk in freezer repair if you guys live in the greater Toronto area.